Publishing xcube datasets
This example demonstrates how to run an xcube server to publish existing xcube datasets.
Running the server
To run the server on default port 8080 using the demo configuration:
$ xcube serve --verbose -c examples/serve/demo/config.yml
To run the server using a particular xcube dataset path and styling information for a variable:
$ xcube serve --styles conc_chl=(0,20,"viridis") examples/serve/demo/cube-1-250-250.zarr
Test it
After starting the server, you can check the various functions provided by xcube Web API. To explore the functions, open
<base-url>/openapi.html.
xcube Viewer
xcube datasets published through xcube serve can be visualised using the xcube-viewer web application.
To do so, run xcube serve with the --open-viewer flag.
In order make this option usable, xcube-viewer must be installed and build:
Download and install yarn.
Download and build xcube-viewer:
$ git clone https://github.com/dcs4cop/xcube-viewer.git
$ cd xcube-viewer
$ yarn install
$ yarn build
Configure
xcube serveso it finds the xcube-viewer On Linux (please adjust path):
 $ export XCUBE_VIEWER_PATH=/abs/path/to/xcube-viewer/build

On Windows (please adjust path):
> SET XCUBE_VIEWER_PATH=/abs/path/to/xcube-viewer/build
Then run
xcube serve --open-viewer:
$ xcube serve --open-viewer --styles conc_chl=(0,20,"viridis") examples/serve/demo/cube-1-250-250.zarr
Viewing the generated xcube dataset described in the example Generating an xcube dataset:
$ xcube serve --open-viewer --styles "analysed_sst=(280,290,'plasma')" demo_SST_xcube-optimized.zarr
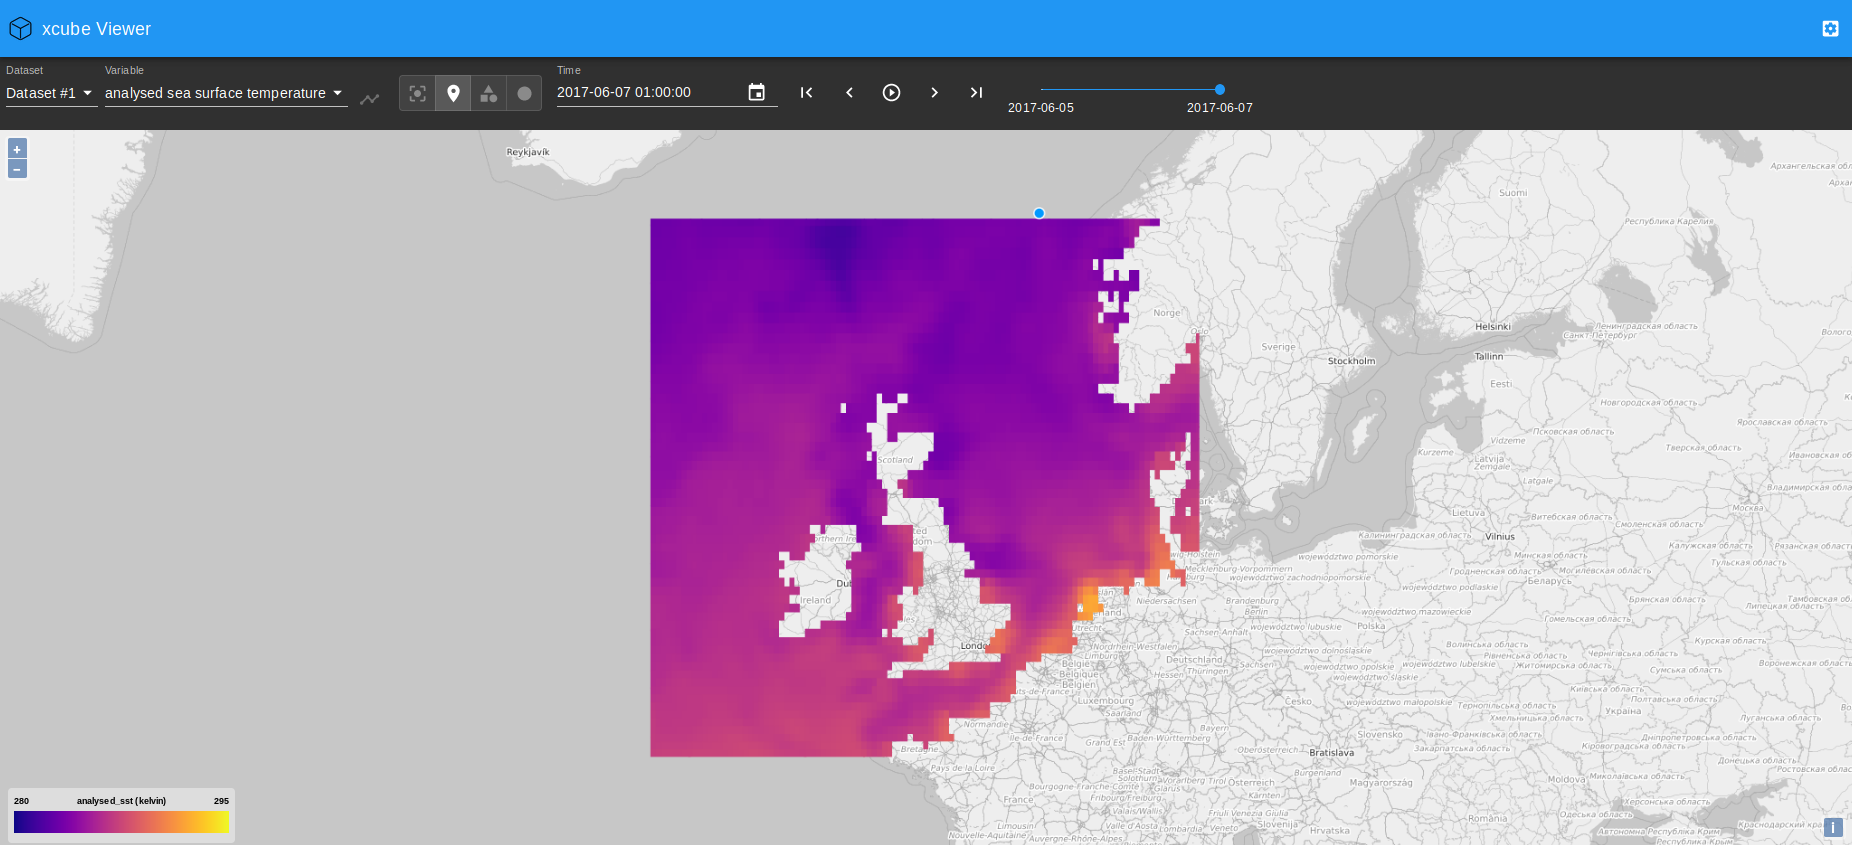
In case you get an error message “cannot reach server” on the very bottom of the web app’s main window, refresh the page.
You can play around with the value range displayed in the viewer, here it is set to min=280K and max=290K. The colormap used for mapping can be modified as well and the colormaps provided by matplotlib can be used.
Other clients
There are example HTML pages for some tile server clients. They need to be run in
a web server. If you don’t have one, you can use Node’s httpserver:
$ npm install -g httpserver
After starting both the xcube server and web server, e.g. on port 9090:
$ httpserver -d -p 9090
you can run the client demos by following their links given below.
OpenLayers
Cesium
To run the Cesium Demo first
download Cesium and unpack the zip
into the xcube serve source directory so that there exists an
./Cesium-x.y.z sub-directory. You may have to adapt the Cesium version number
in the demo’s HTML file.